
»Chapman Syllabus Admin Training
Chapman Syllabus is a centralized platform integrated into Canvas and is a supportive tool for instructors. It allows them to quickly and easily create, duplicate, and publish syllabi, leveraging University information to auto-populate content; it significantly reduces their workload and streamlines syllabus preparation. The platform features advanced analytics, enabling faculty to monitor student engagement with the syllabus.
Chapman Syllabus serves as the official repository for all course syllabi, supporting faculty, students, and academic units with a unified, efficient solution.
Please refer to the sections below for Admin Training.
Admin Training
What is a Template Admin
These modifications include adding, removing, or reordering template components.
- Template Editor- Default role that allows users to edit templates.
Syllabus Editor- Default role that allows users to edit syllabi.
Course Editor- Default role that allows users to edit the primary syllabus.
What is a Template?
A Template in Chapman Syllabus is a predefined syllabus structure that breaks down
content into individual components of information instead of a comprehensive document,
so that it can be authored in a more granular fashion that saves time and ensures
accuracy.
Each level of our organizational structure has its own syllabus template, and components
built at a higher level will be reflected in lower-level templates. At Chapman University,
our structure is as follows:
Chapman University > College > Department > Subject
Example Structure:
- Chapman University (University)
-
- School of Communication SOC (College)
-
-
- Comm (Department)
-
-
-
-
- Communication COM (Subject)
-
-
-
-
-
-
- (Courses)
-
-
-
-
-
-
- First-Year Foundations FFC (Subject)
-
-
-
-
-
-
- (Courses)
-
-
-
-
-
-
- Strategic and Corporate Communication SCC (Subject)
-
-
-
-
-
-
- (Courses)
-
-
-
What is a Component?
A component refers to a specific block or section within the syllabus. Each component
comes with a title and some general formatting. Certain University policies will be
locked and cannot be modified or moved. There are six types:
Content: This is your standard component for writing out course details, including pictures/videos/tables,
and things like that.
Materials: This is for adding additional course material components.
Objectives: This is for adding additional course or program objectives.
Instructor: This is for adding additional instructors, TAs, etc.
Schedule: This is for building a schedule for the class using textboxes, tables, etc., in the syllabus.
Internal: This is for including information that you want your instructors to read but don't want in the final published version.
Sandbox vs Production Sites
In addition to access to the Chapman Syllabus productions site, you also have access
to the Sandbox site chapman-sandbox.simplesyllabus.com. The sandbox site is a place to practice and test making modifications and edits
that do not disturb the production site.
*Caution: Before Making Edits
If a component is not locked, you can make edits. If there is content from the top-level
template and you want to make edits, please note that once you modify that component,
it will break the connection between the top-level template. If there are changes
made at the top-level template, they will no longer get pushed out to the lower level
template that you edited. Keep components locked if you do not want instructors to
make edits.
The following is automatically imported from PeopleSoft.
- Header: College, short course name and number, units, term and year.
- Catalog Description: includes course description including prerequisites, restrictions, and corequisites.
- Course Instructors: some templates allow instructors to add additional co-instructors.
Login
Once you have been assigned the Department Representative role, you can access your department templates by doing the following:
- Go to chapman.simplesyllabus.com and log in.
- Click on Templates.
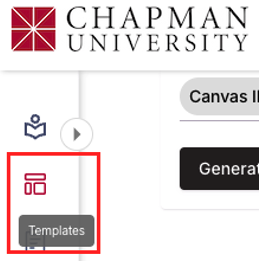
- Under Term, select the term you need to edit (i.e., a future term, not a past term).
- To select the desired template, use the Term drop-down menu.
- The Departments and/or Subjects you have access to will be listed (ex., Nursing)

- Click Edit.

IMPORTANT: Each template in the Chapman Syllabus is tied to a term, so if a template is edited, it applies to a specific term. It is important to keep in mind that each time a new term is created, the template from the most recent term will automatically be used for the new term.
Make Edits
Modify Component
At the top of each component of the template, you have three sliders: optional/required,
invisible/visible, and private/public. Any of those that are greyed out and feature
a lock next to them cannot be toggled as they have been set that way at a higher level
of the organization. You are free to set anything that is not locked as you see fit
for your template.
Scroll to the desired component. If the syllabus component has a text box, you can type your information directly into the text box, copy and paste from another application, or select the edit button to make edits.
Component Settings
You will then have additional Component settings that can be adjusted. Here is an example of the objective component settings outlined below:
Display/Hide Name: This checkbox determines if the component name will display on the syllabi. By default, the display name is visible. To hide the component name, uncheck this box.
Optional/Required: This determines if instructors are required to include the component on their syllabi. By default, components are set to optional, meaning instructors are not required to include them on their syllabi. Toggle the slider to the right to make a component required.
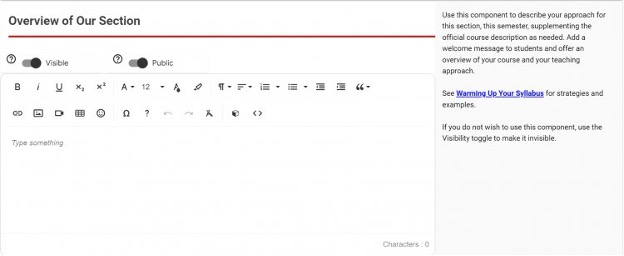
Visible/Invisible: This determines if a component will appear on published syllabi. By default, Components are set to visible, meaning they will appear in published syllabi. To change this to invisible and prevent a component from showing on published syllabi, toggle this slider to the left. If the toggle is grayed out, the component is required per the parent-level template and cannot be made invisible.
Public/Private: This slider determines if a component will be publicly visible or viewable only to a select audience. When a component is set to private, only the instructor assigned to the section and the students enrolled in the section will be able to see this component on the published syllabus.
Add conditional content: This allows conditional logic to be created for the component. By applying the logic, users can hide/show the component or display different sets of content within the component based on the criteria defined. For details on how to set up conditional logic, please see Creating Conditional Logic.
Lock: Locking a component using the checkbox will prevent it from being editable in a lower (child) template. You can lock a component on a higher-level template by checking the Lock box in the component settings.
Editors: This determines who will have the ability to edit and make changes to the component. Check the appropriate box for components to be editable by course designers at the course level or instructors at the section level. If neither checkbox is selected, it will only be editable by the Template Editor at the template level. Editors' Permissions (Only available at the Template level). Department Representatives (Template Editor, Syllabus Editor, or Course Editor) can control who will have the ability to make changes to a component created at the template level. The options for the Editors section of a component are: Course and/or Section.
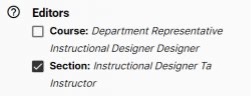
Course: If enabled, Template Editor, Syllabus Editor, or Course Editor.
Section: If enabled, Instructors can edit the component.
Content field ordering: The order of the content fields in the component can be reordered by clicking the Reorder button and either dragging and dropping them into the preferred order or using the arrows
List Style: You can select from the options None, Bullet Points, Numbers, or Roman Numerals.
Help text: Enter custom text to help guide or instruct the end-user as they edit the component. Help text can be formatted and can include links, videos, and images. You must click in the Help text area to edit the text. Note: Help text can only be created/edited on a custom component at the level it was created.
IMPORTANT: Changes made to individual components will be saved automatically. Once all changes
are complete, be sure to click the Submit button at the bottom of the page for changes to be implemented on the template.
Rich Content Editor
Chapman Syllabus provides plain text entry fields and a Rich Content Editor (RCE) to customize text formatting, apply heading structure, add rich media, or organize items into tables.
The RCE toolbar in the Chapman Syllabus allows you to apply:
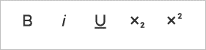
Basic Formatting - Bold, italicize, or underline text. Apply subscript or superscript to characters and numbers.
![]()
Rich Formatting - Select a different font family or font size. Apply color to text and backgrounds.
Paragraph Formatting - Apply heading structure and alignment to text, or create an ordered or unordered list. You will also find the options to indent paragraphs
or insert a quote to emphasize a block of text. The paragraph tool allows you to set
accessible headings within textboxes.
![]()
Insert Objects - Insert a hyperlink; upload or link to an image; link, embed, or upload a video file; and insert a table. Emoticons are also available to insert into (or emphasize) text.
- Make sure to Save, where applicable, after editing information.
- Select Submit when all required sections are complete.
Add an Additional Component
It is recommended that you only add Content components to your template. Materials, Instructor, and Schedule components are populated at the school level, and if you add them, it may interfere with an instructor's ability to publish their syllabus.
- You can add additional components by clicking on the + Add new component at the bottom
of the syllabus or + Add at the top of the syllabus.

- Enter the Name of the new component. This is used to identify the purpose of the component content.
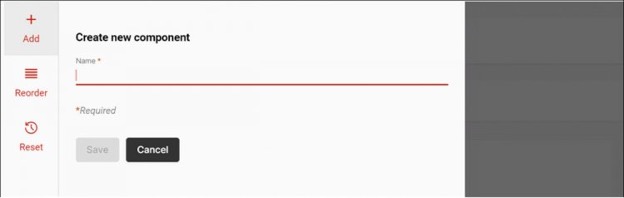
- Select the Content Component type.
- Click Save to create the component.
What is a Primary Syllabus
A Primary Syllabus refers to a document that lives at the course level and impacts
syllabi for ALL sections of that course.
As an example, let's say that COM 102 is a course with SIX sections: COM 102-01, COM
102-02, COM 102-03, COM 102-04, COM 102-05, and COM 102-06. COM 102 has a course designer (gets a role in the Chapman Syllabus as a Course Editor)
who is in charge of editing the Primary Syllabus for COM 102. When the course designer
makes changes to the COM 102 Primary Syllabus, those changes will propagate out to
the syllabi, significantly reducing their workload and streamlining syllabus preparation.

Syllabus Library
The Syllabus Library is a centralized repository for all campus syllabi, archived
by term.
Using the search tool, you can quickly find any class syllabus that is set to Public
using a variety of criteria. All syllabi stored in the Syllabus Library are maintained
in mobile, web, and print format for easy viewing.
The Syllabus Library is accessed by clicking Syllabus Library from the left navigation.
To Search and Filter the Syllabus Library:
The syllabus search and filter tool within the Syllabus Library allows you to narrow down results by various criteria, including Keywords, Term, Organizational Unit, Subject, Course Number, and Instructor. Any syllabus that meets the results of your filter will be returned and can be viewed in a mobile, web, or print format.
- Term: Terms can be filtered by Future, Current, or Historic syllabi. Within each category, you can further filter by term by clicking the Caret after the category. You may filter by multiple criteria; check all that apply.
- Keyword Search: The library can be searched by keyword using the Looking for something… search field. Enter the word(s) and hit Enter.
- Subject: Select the appropriate subject code from the drop-down list.
- Course Number: Select the appropriate course number from the drop-down list.
- Organization: Select the appropriate organization from the drop-down list.
- Instructor: Type the instructor's name into the search bar.
To view, print, or share a syllabus:
- View: To view a digital version of a syllabus, click the View button, which is the icon on the left.
- Download or Print: To download or print a PDF version of a syllabus, click the Print button, which appears as the center button underneath the syllabus thumbnail. You can then either choose to download the document or send it to a printer.
- Share: To share a digital version of the syllabus, click the Share button. From there, you can copy the syllabus URL or syllabus PDF URL.
Accessibility Checker
- Unformatted lists
- Table captions
- Sequential headings
- Table headers
- Color contrast
- Image alt text
- Empty headings
- Heading max length (< 120 characters)